Treat filter replacement as a measurable risk decision, not a hunch.
Imagine a home that just endured a week of wildfire smoke while a newborn slept downstairs — health stakes and budget constraints collide. Instead of guessing, treat replacement as a risk-management routine: run objective, repeatable checks (airflow measurement, filter pressure drop or a simple particle counter, plus visual inspection), log the results, and compare against a clean baseline. Replace when measurements show meaningful degradation rather than on a fixed calendar alone.
- Replace if airflow drops by more than 20% versus baseline.
- Replace if particle-count testing shows removal efficiency down >10%.
- Typical schedule: 6–12 months normal; ~3 months with heavy smoke or many pets.
Practical replacement cadences
Starter replacement cadences
Establish a baseline schedule that matches typical household or facility conditions, then adjust by inspection and objective checks (airflow, pressure, particle counts). The examples below are starting points—plan to move earlier if visual loading or measurement thresholds are reached.
- Low occupancy, low pollutants (baseline home): replace every 12 months. Inspect every 3 months; run periodic particle counts if available.
- Homes with pets or allergy sufferers: replace every 6 months. For guidance on pet-specific servicing and filter selection see keeping pet dander filters working well.
- Urban, smoker, renovation, heavy cooking: replace every 3 months. Inspect monthly; expect faster loading with open windows during high outdoor pollution.
- Continuous commercial operation or sensitive environments: replace every 1–3 months depending on traffic and standard operating procedures; follow facility protocols and manufacturer’s guidance.
- Central HVAC with high-efficiency filters: start at 3–6 months and adjust by measured pressure drop across the filter bank.
How to commit and when to accelerate replacement
Treat the cadence as a budgeted plan: mark calendar reminders, keep at least one spare filter on hand, and record runtime (hours per day). Accelerate replacement when any of the following objective signs appears:
- Visible dust cake or dark discoloration across the pleats.
- Measured pressure drop increases about 25% above clean baseline or airflow falls noticeably.
- Particle counts rise in occupied spaces or occupants report consistent symptoms.
These cadences aim to simplify planning; final decisions should be made with inspection and measurement, not calendar age alone.
Buy filters in sets to reduce per-unit cost and ensure quick replacement. Keep simple logs: installation date, runtime, and any measurement that triggered early change.
Quick symptom triage and myth→fact corrections
Reduced airflow can come from a clogged filter, a failing fan, or an obstructed intake.
Measure pressure drop or airflow against baseline; high pressure rise indicates filter resistance and justifies replacement, while normal pressure with low flow points to mechanical or duct issues.
True HEPA media capture particles, not gases; odors come from prefilters, VOCs, or microbial growth.
Inspect and replace the activated-carbon or prefilter element; if mold or spores are present on the HEPA surface, replace the HEPA too.
Dust on the intake or pleat faces signals heavy particle loading and rising pressure drop.
External dust deposits correlate with reduced capture efficiency and imminent end-of-life for the filter media.
Noise or longer runtimes can indicate higher resistance from a loaded filter but also fan wear or obstructed airflow.
Compare motor current, RPM, and pressure drop; rising motor load plus high pressure drop points to filter replacement, while unchanged pressure suggests mechanical service.
10–15 minute monthly inspection and log
-
Prepare and document
Set a single bright light, stopwatch, and the log sheet. Note model, run-hours, date, and room.
-
Visual pleat inspection
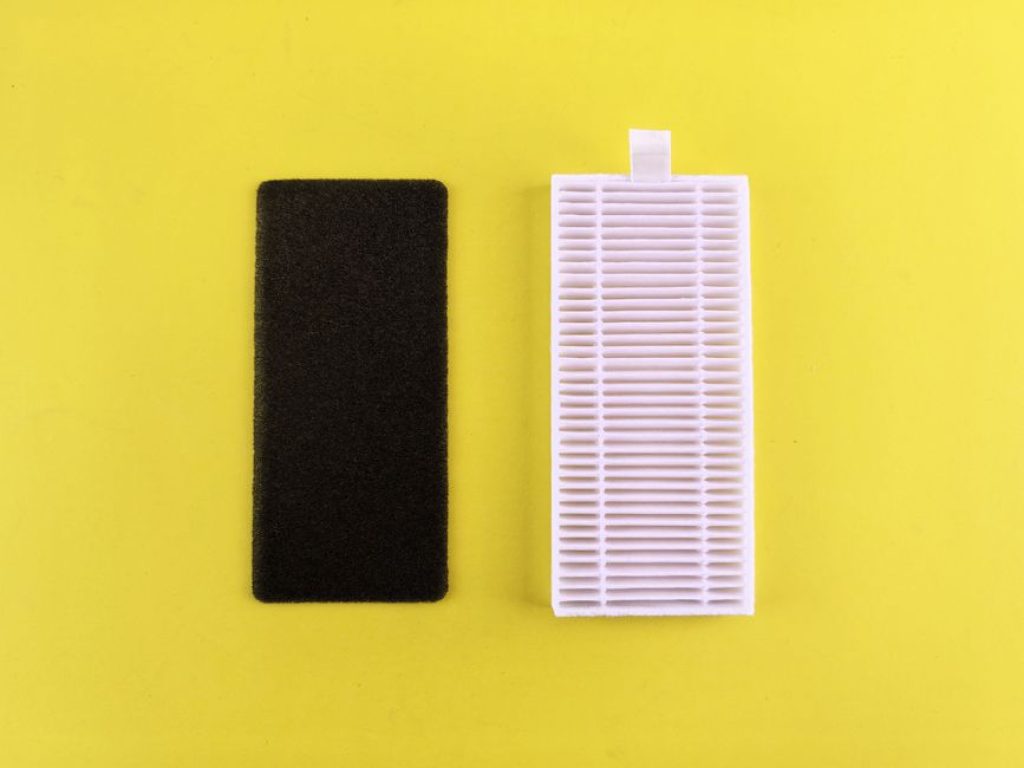
Remove the prefilter if present and scan pleats for dark bands, dust bridges, or sagging. Photograph pleats against the light source for comparison.
-
Light-through pleats test
Hold a flashlight 15–30 cm behind the filter in a darkened room; inspect for uniform light. Mark zones where light is dim or blocked—these show loading.
-
Odor and tactile check
Smell both sides while briefly running the unit. Note persistent chemical or musty odors, sticky residue, or unusual particulates.
-
Quick airflow check & log
Assess subjective airflow by hand-feel or note fan speed and runtime; record any reduction from baseline. Log: date, hours, pleat score (0–3), odor (none/mild/strong), action (ok/clean/replace).
Take one consistent photo monthly with the same light and distance. Store with the log and flag new dark bands or sagging.
Inexpensive objective checks for a clogged HEPA
Simple airflow checks
Measure outlet velocity with a handheld anemometer or an inexpensive vane meter at the grille center (average 3–5 points). Record a baseline after a fresh filter. Treat these drops as meaningful:
- Drop >20% from baseline — increased restriction; inspect and clean prefilter.
- Drop >35–50% — replace the HEPA.
Verify the unit’s rated flow or what CADR do I need to maximize filter life when interpreting percent drops.
Particle-count verification
Use a consumer particle counter (0.3 µm channel). Run the purifier at max for 10 minutes in a closed room and compare counts with the unit off. Interpret results:
- Reduction <50% at 0.3 µm — poor performance, likely clogged.
- 50–80% — partial loss; monitor and prepare to replace.
- >80% — working as expected.
Runtime and pressure trends
Log run-time required to reach a target PM2.5 (e.g., 12 µg/m3). If required runtime increases by >30% versus baseline, the filter is restricting flow. For users with a manometer, a pressure-drop increase of >50% from new is also a clear replacement trigger.
Record outlet airflow, one downstream particle-count reading at 0.3 µm, and typical runtime to reach target PM2.5. Compare future checks to these numbers to make objective replacement decisions.
Which parts can be cleaned and which must be replaced
Hazardous exposures demand replacement, not cleaning. Wildfire smoke, chemical vapors, and biological contamination can bind to media or saturate adsorbents; replacement prevents re-release and maintains capture efficiency.
For specifics about chemical adsorption and decisions on boarding activated carbon or filter replacement, see VOC removal and when to replace filters. If in doubt after a hazardous event, replace the HEPA and prefilter.
How the recommendations were developed
Recommendations were derived from controlled dust-loading experiments and field validation, using repeatable measures—pressure drop, percent airflow loss, and downstream particle counts—to define replacement triggers.
-
Laboratory dust-loading
Standard aerosols were applied while recording differential pressure and downstream 0.3 µm counts to identify failure points where filtration efficacy declined.
-
Field validation
Protocols were tested in homes, clinics, and smoky environments to confirm thresholds matched real-world performance and occupant exposure outcomes.
-
Threshold selection
Conservative limits were set at the onset of measurable airflow loss or particle breakthrough; simple, inexpensive metrics were prioritized for routine checks.
Prioritized maintenance calendar and decision flow
-
Monthly 10–15 minute inspection
Run a brief checklist each month: look for visible dust on pleats, perform the light test across the filter, sniff for unusual odors, and note perceived airflow. Record results in a simple log with date and any anomalies.
-
Quarterly objective checks
Every 3 months perform at least one objective test: measure airflow (compare to baseline), check pressure-drop trend if gauge is available, or run a particle-count spot check at 0.3 µm. If any metric crosses the conservative thresholds from lab validation, advance to replacement.
-
Prefilter maintenance (monthly–biweekly)
Clean or vacuum washable prefilters on a schedule based on load: monthly in normal homes, biweekly in dusty or pet environments. Replace disposable prefilters when visibly clogged or when cleaning no longer restores airflow.
-
Replace-now triggers
Replace the HEPA immediately after smoke exposure, chemical events, mold growth, visible pleat damage, or if objective tests show >20% airflow loss or failed particle-removal performance. Also replace if runtime/pressure trends show steady degradation despite prefilter cleaning.
-
Annual baseline review
Once per year review logs and adjust the cadence for the coming year—shorten intervals for high dust, occupants with respiratory issues, or frequent pollutant events.
Key takeaways
- Monthly Checks Monthly visual and airflow checks catch most problems before performance falls significantly.
- Quarterly Tests Quarterly objective tests (airflow, pressure, particle counts) provide repeatable triggers for replacement.
- Prefilter Care Keep prefilters clean—this preserves HEPA life and prevents premature replacement.
- Immediate Triggers Replace immediately after smoke, mold, chemical exposure, visible damage, or failed objective thresholds.
Measurable protection
- Prioritize trend-based triggers over fixed schedules.
- Log readings and keep a simple decision record.
- Treat smoke, mold, or chemical events as immediate replace triggers.
The goal is measurable protection: keep HEPA performance within validated thresholds through routine inspections and targeted spot checks. Objective metrics—airflow, pressure trend, particle-count reduction—prevent both unnecessary early replacement and dangerous delayed disposal.
Follow the monthly 10–15 minute inspection, log trends, and run the inexpensive tests when triggers appear. Replace when objective thresholds are crossed; conserve lifespan when metrics remain acceptable.