When every degree matters, a small discrepancy causes panic.
At 2 a.m., a baby feels warm but reads 100.6°F rectally and 99.0°F axillary — that 1.6°F gap spurs urgent calls, ER visits, or delayed care. Caregivers face real consequences because a single number often dictates action.
Quick fixes and correct interpretation cut doubt: identify measurement site, timing, and device limits before deciding.
- Rectal ≥100.4°F (38°C) = fever in infants; axillary typically ~0.5–1.0°C (~0.9–1.8°F) lower.
- Tympanic thermometers are often unreliable under 6 months; prefer rectal or temporal artery readings for infants.
- Simple fixes: reposition the probe, wait 5–10 minutes after feeding or crying, clean probes and replace old devices.
How different thermometers and sites affect readings
Thermometers measure temperature in different ways and from different body locations; those choices change the number shown without indicating a fault. Key device types:
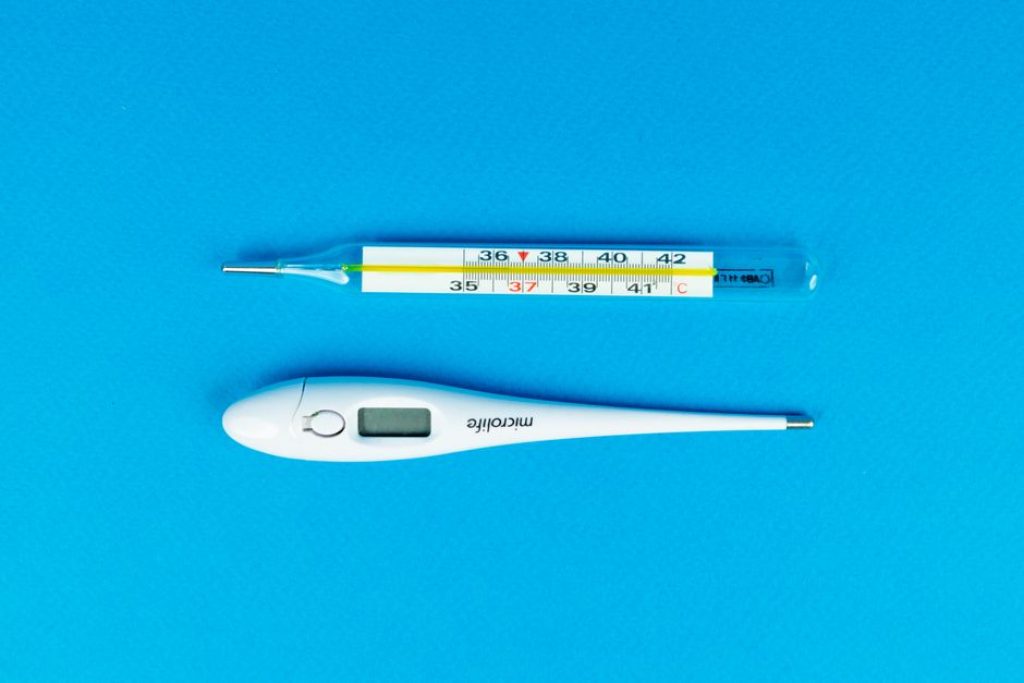
- Digital contact (rectal, oral, axillary): measures tissue temperature at the probe site. Rectal probes approximate core temperature most closely. Oral and axillary readings are normally lower.
- Tympanic (ear): uses infrared to detect eardrum heat. Fast but highly technique-sensitive (ear canal position, earwax, movement).
- Temporal artery (forehead) and non‑contact infrared: sample superficial blood flow and skin temperature. Convenient, but accuracy depends on proper sweep distance/angle and ambient conditions.
Why sites differ
- Core (rectal) temperature is highest. Surface sites (axilla, forehead) lose heat to environment, so they read lower.
- Measurement errors come from probe placement, body movement, recent feeding, crying, bathing or covering the baby.
Expected variance (typical)
- Within the same device/site: repeatability ±0.1–0.3°C (±0.2–0.5°F).
- Between common sites: up to ~1.0°C (≈1.8°F) difference is normal between rectal and axillary/forehead.
- Typical offsets to expect vs rectal: oral ~−0.3 to −0.6°C, axillary ~−0.5 to −1.0°C, tympanic/temporal variable ±0.3–0.6°C.
Practical rules
- Compare readings only from the same site and device when monitoring trends.
- Treat rectal ≥38.0°C (100.4°F) as fever in infants; adjust thresholds if using oral/axillary/forehead accordingly.
- Re‑measure if conditions (crying, recent feeding, wet skin) could have skewed the first result.
Small, repeatable offsets: diagnose technique and timing
Repeated small differences (≈±0.5–1°C/±1°F) most often come from how and when measurements are taken rather than a failing thermometer. Focus on consistent site, timing, and probe positioning before assuming device error.
Quick troubleshooting checklist
- Use the same site and device every time. Compare only like-for-like (ear vs ear, axillary vs axillary).
- Standardize timing. Wait 10–15 minutes after feeding, bathing, vigorous play, or crying; these change skin and core temperature.
- Prepare the site. For axillary/temporal readings, dry and expose the skin for 2–5 minutes; for ear, clear the canal and aim probe correctly.
- Ensure proper contact and orientation. Hold the probe steady until the device signals; avoid gaps, loose placement, or movement.
- Take 2–3 rapid repeats and record the trend. If readings cluster within ±0.5°C, use the average for clinical decisions.
If offsets persist after these steps, consider device calibration or switching to a more stable site (rectal for infants).
• Wait 10–15 minutes after feeding, bathing, or crying.
• Dry and expose skin for at least 2 minutes for axillary/temporal checks.
• If uncertain, repeat twice and use the average.
Step‑by‑step verification protocol
A short, ordered checklist to decide whether a >1°C (2°F) discrepancy comes from environment, technique, or a defective thermometer.
-
1) Power and self‑test first
Replace batteries or recharge and run any built‑in self‑test. Low battery voltage commonly causes sensor drift or intermittent readings; a device that fails self‑checks is more likely faulty than the patient being abnormal.
-
2) Stabilize environment and acclimatize
Place the thermometer and infant in the same, draft‑free room for 10–15 minutes and remove hats or heavy covers. Skin‑surface and infrared sensors read skin temperature, which is skewed by ambient temperature, sweating, or evaporative cooling—equilibration reduces environmental bias.
-
3) Take repeated, same‑site samples; confirm with rectal when needed
Collect three measurements at the same site (30–60 seconds apart) and note movement, crying, feeding, or wet skin. If discrepancy >1°C persists between devices, obtain a rectal reading for infants under ~3 months or when clinical decisions depend on exact core temperature—rectal measurement approximates core temperature and helps determine whether the non‑rectal device is inaccurate.
If all steps complete and a single unit remains consistently >1°C different, consider warranty replacement or professional calibration; document serial/model and sample results before contacting the manufacturer.
Rectal temperature is the best bedside core reference for young infants but requires correct technique: use a dedicated probe or cover, lubricate, insert only to the depth recommended by the device (typically 1–2 cm / ½–1 in for small infants), and never force. Follow manufacturer instructions to avoid injury and cross‑contamination.
Forehead and non‑contact IR thermometers: common myths
They estimate surface or temporal‑artery temperature; readings vary with skin blood flow and surface conditions.
Skin temperature can lag or fall below core temperature after feeding, crying, or exposure, producing low or unstable values.
Most non‑contact IR units require a specific distance and angle; being too far or off‑axis gives weak or noisy signals.
The sensor’s field‑of‑view and signal strength drop with distance, causing low or jumpy readings.
Barriers, evaporative cooling from sweat, and lens grime all shift or destabilize readings significantly.
Obstructions change emitted infrared radiation or reduce sensor throughput, producing biased or erratic measurements.
Checklist
Maintain the specified distance (typically 2–5 cm; follow device manual) and hold perpendicular to the forehead. Expose dry, uncovered skin: remove hat/hood, wipe sweat, push hair aside. Let the baby acclimate 3–5 minutes after coming indoors or after feeding/crying. Clean sensor lens regularly with a soft cloth and 70% isopropyl; avoid abrasive cleaners. Avoid drafts, direct sun, or heat sources; take 2–3 readings and use the median.Following these steps resolves most low or jumpy forehead/non‑contact readings.
Ear thermometer FAQs and fixes
Are ear thermometers safe and accurate for infants?
Tympanic thermometers are generally reliable for babies older than about 6 months. For newborns and infants under 3 months, rectal measurements are more dependable when fever is a concern.
Why does one ear read higher or lower than the other?
Differences commonly stem from cerumen, probe angle or shallow insertion, recent crying or feeding, and natural ear‑canal size asymmetry. A unilateral middle‑ear infection can also produce a higher reading on that side.
How should the probe be positioned for consistent readings?
For infants under 1 year, pull the pinna straight back and slightly down (back and up for older children) to straighten the canal, insert gently until sealed, and hold steady while measuring. Wait 10–15 minutes after feeding or vigorous crying before taking a reading.
What hygiene and maintenance prevent one‑sided errors?
Use disposable probe covers, clean the probe per manufacturer instructions, and remove visible wax or seek clinician help for buildup. Allow the device to acclimate to room temperature if moved between environments.
When should an alternate site be used instead?
Use rectal thermometry for newborns or when ear anatomy or infection prevents accurate tympanic placement. For older infants, a reliable axillary or oral digital reading is an acceptable alternative if the ear cannot be measured.
Newborns (<3 months): use rectal.
If the baby has ear pain, discharge, or known canal abnormality, use an alternate site and seek clinical advice. Do not force the probe into a blocked or painful ear.Placement and timing: axillary, probe, and rectal
Axillary (underarm)
- Dry the skin and place the tip centered in the deepest part of the armpit so it contacts skin, not clothing. Tuck the baby’s arm snugly against the chest to trap the probe against skin. Hold still until the thermometer signals a stable result — or, if the device has no signal, leave undisturbed for at least 3 minutes.
Probe‑style digital (oral/axillary probes)
- For oral use, place the probe under the tongue midline toward the back, close the lips, and keep the mouth closed until the beep. For axillary use, follow the axillary steps above but wait for the device’s signal. Always clean the probe between uses and use the same site/method when tracking trends.
Rectal (infants)
- Use a short, blunt digital probe with a guard; apply a water‑soluble lubricant. Insert gently about 1/2–1 inch (1–2.5 cm) for small infants (slightly more for older babies), never force insertion. Hold the baby securely and wait for the thermometer’s stable reading — typically the device will beep within 10–60 seconds. Clean and disinfect after each rectal use.
Important: always rely on the thermometer’s stability signal when available. If readings change with site or caregiver, repeat using the same site and follow these placement steps.
Buying checklist for probe thermometers:
- Flexible short probe (less risk of injury), waterproof for cleaning, and clear hold/read times listed on packaging. Prefer quick stable read, washable probe covers, and pediatric‑rated accuracy.
What to look for in a probe‑style thermometer
Symptom → Immediate fix
- Small site offset Reading varies by 0.3–1°C between sites: repeat using the same site and same thermometer; document time and method.
- IR/forehead error Sudden low or high forehead/IR values: dry and uncover skin, wait 2–3 minutes for acclimation, clean lens and re-measure at recommended distance.
- Probe placement Single-ear or probe slips: re-position probe correctly, use gentle traction on the ear for tympanic devices, or switch to a calibrated rectal probe for infants.
- Inconsistent device Repeated inconsistent readings: replace batteries, run a control check with a second validated thermometer, then replace device if discrepancy persists.
10–30 minute action plan and red flags
- If problem fixes: note device, site, and time; continue same method for trend tracking.
- If problem persists after checks: replace or return device under warranty.
- Urgent care if red flags present (below).
Action plan (10–30 minutes): confirm site and technique, clean sensor/lens, replace batteries, repeat three readings separated by 2–3 minutes using the same device; compare with a second validated thermometer. If readings still disagree by >0.5–1°C or device behaves erratically, stop using it and replace. For replacement choose a pediatric‑rated digital probe or clinically validated forehead IR with good battery life and waterproof probe head. Red flags (seek urgent care): infant <3 months with rectal ≥38°C; any age with persistent temperature ≥40°C, difficulty breathing, seizures, severe lethargy, poor feeding, or prolonged vomiting.