A water flosser seems ideal for braces—faster, gentler—but could a high‑pressure jet undo orthodontic work?
Wearing fixed braces forces tradeoffs: metal brackets, archwires and bands trap plaque, and traditional flossing becomes awkward, so a pressurized water flosser looks attractive. Yet concerns run wide: can the pulsating stream pry off brackets or adhesive, push food under bands, or aggravate newly bonded hardware and inflamed gums? Advice is mixed—some orthodontists urge caution after bonding while manufacturers tout safety and superior plaque removal.
The real question isn’t only whether a flosser cleans better, but whether its pressure and technique cause mechanical damage or soft‑tissue harm that outweighs benefits. This section evaluates if water flossers are safe around brackets, wires and fresh bonding, and which pressure, timing and technique choices matter most.
What a water flosser is and how it works
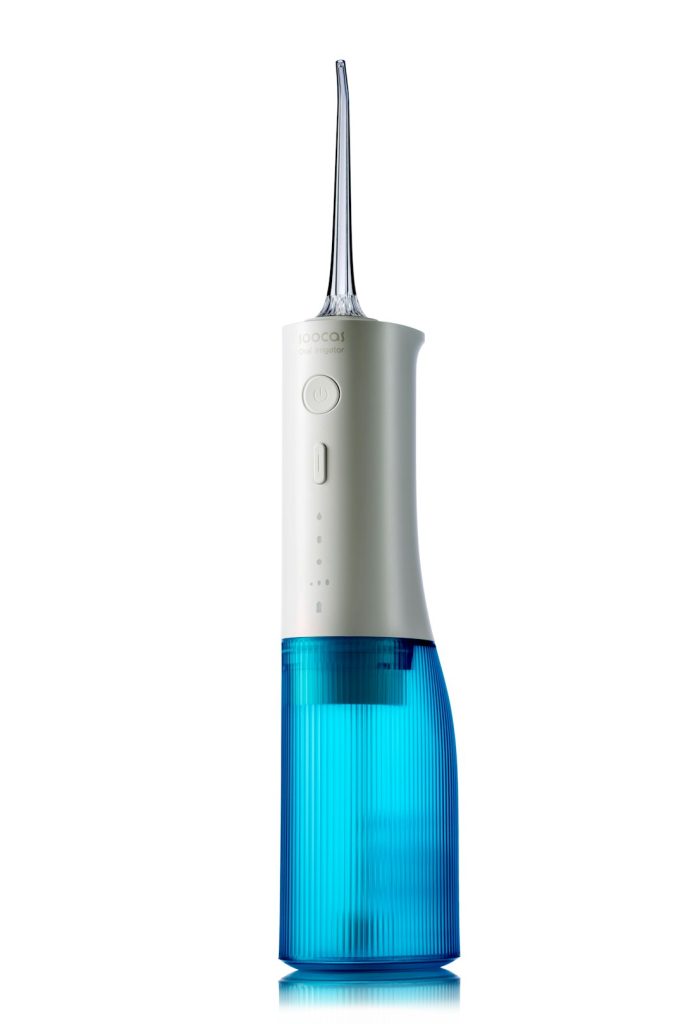
A water flosser is a handheld oral hygiene device that emits a pulsed, high‑velocity stream of water to remove food debris and disrupt dental biofilm. Rather than cutting or scraping with fiber, it relies on hydrodynamic shear — the force of moving fluid — plus micro‑streaming to displace bacteria from tooth surfaces, bracket bases and the gingival margin.
How the mechanism reaches hidden areas
Commercial irrigators allow pressure and flow adjustments; most operate in a low‑to‑moderate pressure range and deliver a measurable flow (mL/min) in short pulses. Those pulses create concentrated jets that can follow the contour of a bracket and run under archwires, reaching the base of brackets and the subgingival sulcus more effectively than string floss or interdental brushes, which often cannot pass around wires or beneath bonded appliances.
Key practical differences:
- Water jets: access under wires and into sulci via fluid dynamics.
- String floss: physically disrupts contact points but is difficult around brackets.
- Interdental brushes: good for open spaces, poor under archwires.
Clinical evidence supports these mechanical effects: randomized trials and systematic reviews report significant reductions in gingival bleeding and modest-to-meaningful plaque reduction when a water flosser is added to routine care for orthodontic patients. The device therefore offers a scientifically plausible, appliance‑friendly adjunct to traditional flossing.
Safety consensus and common failure modes
Clinical guidance and trial data converge: water flossers are generally safe for fixed orthodontic appliances when used at low–moderate pressure with correct technique. Benefits include reduced bleeding and improved plaque control without routine bracket loss.
How damage can occur
- Direct pulsed force on a bonded bracket can shear the adhesive if the tip is aimed squarely under the bracket base or held stationary against it.
- Fresh adhesive is weakest immediately after bonding; heavy irrigating pressure can compromise the initial set.
- Loose bands or appliances are vulnerable to dislodgement because they lack full retention.
Practical technique minimizes risk: use a low–moderate pressure setting, sweep the tip along the gumline and between teeth rather than pointing directly at bracket bases, keep the tip moving, and use short bursts.
Wait at least 24–48 hours after bonding before using a flosser; avoid the highest pressure for the first week. Contact the orthodontist if a bracket feels loose, adhesive is chipped, or discomfort persists.
Step-by-step water-flossing routine with braces
-
Brush first
Brush thoroughly with fluoride toothpaste and an orthodontic or soft-bristled brush before irrigating. Removing the bulk of plaque first reduces the time and pressure needed with the flosser.
-
Start on low pressure and test
Set the device to the lowest or low–medium setting and test the stream on the sink or palm to confirm pulsation. Increase pressure only gradually if comfortable and brackets are not freshly bonded.
-
Hold and angle the tip
Use an orthodontic/tapered tip held about 1–2 mm from the tooth at roughly 90° to the gumline; this directs pulses into the sulcus and around bracket bases. Stabilize the hand by resting the elbow, wrist, or heel of the hand against the chest or by leaning the head into the chair headrest to prevent sudden movements.
-
Timing and how to target wires and bands
Spend about 1–2 seconds per tooth, pausing at the gingival margin and sweeping along the bracket base and under the archwire. For bands and posterior teeth, use slightly longer sweeps and irrigate both cheek and tongue sides to dislodge trapped debris.
-
Finish with a rinse and micro-tips for tight spots
Rinse with water or mouthwash to flush loosened material, then empty and clean the reservoir. Use micro-jet or interdental orthodontic tips for tight spaces and greater comfort; stop if any bracket feels loose and contact the orthodontist.
Wait 24–48 hours after bonding before using a flosser; avoid high pressure around new or loose appliances.
Do not blast newly bonded brackets. Wait 24–48 hours after bonding before using a water flosser. If pressure is needed earlier, keep the setting on low and avoid directing the stream straight at the bracket base. If any bracket feels loose or sensitive, stop use and contact the orthodontist.
Pressure, tips and frequency for braces
Begin on the lowest setting and use conservative pressure. Recommended starting pressure is 10–20 PSI (device “low”). For routine cleaning, a comfortable working range is 20–50 PSI; avoid sustained use above 50 PSI to prevent soft‑tissue irritation or stress on brackets. If bonding was recent, remain at the low end for 24–48 hours.
Use tips designed for orthodontics and pulsation:
- Orthodontic/angled tips: direct pulsed flow around wires and brackets, removing plaque under ligatures.
- Pulsed flow (typical pulsation modes) helps disrupt biofilm more effectively than steady jets.
Tips to avoid:
- Narrow, high‑pressure pinpoint tips or rigid metal picks that concentrate force on a bracket.
- Direct spraying at a visibly loose bracket.
Frequency and when to reduce:
- Twice daily is ideal for most patients. Reduce to once daily or pause for a few days after painful adjustments, oral surgery, severe ulceration, or if tissue remains inflamed. Consult an orthodontist or dentist if bleeding, increasing pain, or any bracket loosens after use.
Practical checklist for choosing a flosser with braces
-
Pressure range and verifiable specsChoose models that publish numeric pressure (PSI or kPa) and offer fine increments; clinicians should verify lowest and highest settings against recommended 10–50 PSI for braces. If precision matters, check independent reviews that measure delivered pressure.Look forNumeric PSI/kPa specs with small incremental settings (e.g., 5 PSI steps) and a low start point (~10 PSI).AvoidVague labels like "low/medium/high" or no numeric pressure data.
-
Orthodontic tip and pulsed modesA dedicated orthodontic/periodontal tip or a soft tapered tip is essential; pulsed flow modes reduce bracket stress. Confirm that the orthodontic tip is included or sold separately and locks securely.Look forIncluded orthodontic or interdental tip and a pulsed/orthodontic mode.AvoidOnly a generic standard tip with continuous high-pressure flow.
-
Reservoir size and cordless vs countertop trade-offsReservoir capacity dictates uninterrupted time: ~200–600 mL for a full session. Cordless units offer portability but smaller tanks and finite runtime; countertop models give larger reservoirs and steadier power.Look forReservoir ≥200 mL, clear runtime/battery specs for cordless units.AvoidVery small tank with no runtime or recharge information.
-
Hygiene and ease of cleaningRemovable, wide-mouth reservoirs, dishwasher-safe parts, and easily replaceable tips limit biofilm build-up. Also prefer designs with accessible tubing and tip storage to allow routine disinfection.Look forRemovable/wide-fill reservoir, dishwasher-safe components, replaceable tips.AvoidFixed narrow reservoirs, hidden tubing, or non-replaceable tips.
Tip compatibility with orthodontic hardware
Appliance‑specific behavior
Different tips interact with orthodontic appliances in distinct ways. For fixed braces, an orthodontic/pulse tip directs water around brackets and under wires; use lower pressure to avoid stressing fresh bonds. For removable aligners, remove the trays first — water flossers clean aligners externally but should not be used inside the mouth around seating edges at high pressure. Palatal expanders and other intraoral hardware trap debris; use a narrow, low‑flow tip and irrigate gently to avoid driving water into the screw mechanism. For fixed (bonded) retainers, follow the wire line with a focused tip at low pressure to flush plaque without lever action on the composite.
Check tip fit and replacement intervals; refer to manufacturer guidance for finding replacement brush heads that fit. For complex hardware or recent bonding, err on the side of lower pressure and consult the treating clinician.
If brackets, bands, or retainers feel loose or if bleeding persists beyond a few days
Avoid high pressure directly at new bonds or adjusters
Schedule a professional check before changing tip type for complex appliances
Common myths about water flossers and braces, debunked
False — proper pressure and technique won’t loosen bonded brackets.
Brackets are resin-bonded; avoid high pressure and wait 24–48 hours after bonding.
False — it complements brushing, not replaces it.
Jets remove interdental debris and reduce bleeding but don’t remove surface plaque.
Mostly false — plain water is safe; corrosive solutions can cause damage.
Orthodontic metals and ceramics tolerate water; avoid bleach, strong oxidizers, or soaking.
How the recommendations were developed
Recommendations arose from controlled laboratory testing and clinical review. Hands-on trials used typodonts with bonded brackets and archwires while measuring irrigation pressure and monitoring bracket displacement.
-
Laboratory testing
Typodonts with fresh composite bonds and full archwires were irrigated at calibrated pressures (10–70 PSI); bracket movement, adhesive failure, and tip contact were recorded.
-
Clinician consultation
Board-certified orthodontists and dental hygienists evaluated technique, safe-delay windows after bonding (24–48 hours), and real-world tolerances to corroborate lab findings.
-
Literature and specs review
Peer-reviewed clinical studies, manufacturer pressure curves, and tip compatibility charts were reviewed to align practical guidance with documented safety thresholds.
Testing simulated clinical conditions but does not replace individualized professional advice.
Quick questions
Can a flosser loosen braces?
Not when used low-to-moderate; high pressure or directing flow at fresh bonding can risk movement. Stop and see the orthodontist if a bracket shifts.
When is it safe after bonding?
Wait 24–48 hours and follow the clinician’s instruction before routine use.
What if bleeding or pain occurs?
Minor bleeding may improve with gentle use; persistent bleeding, pain, or loosening means stop and contact the orthodontist.
Bottom line
- Start low and progress cautiously.
- Use an orthodontic/pulsed tip.
- See the orthodontist for looseness.
Begin at the lowest setting with an orthodontic/pulsed tip and use the flosser after brushing. Avoid use 24–48 hours after bonding or on loose appliances; contact the orthodontist if a bracket or wire moves.