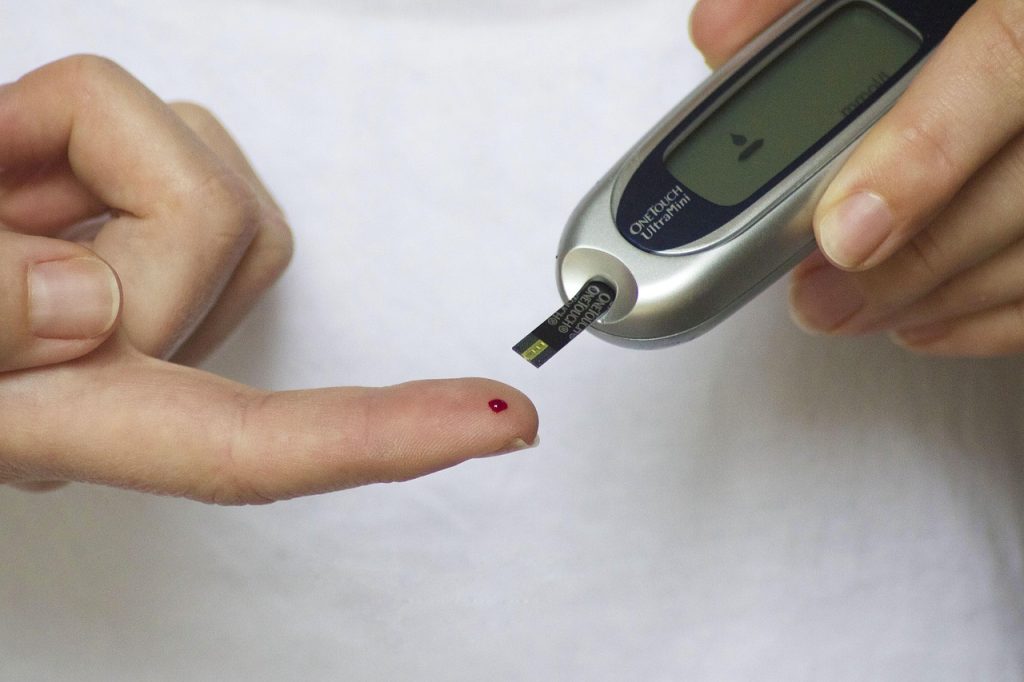
A single unexpected fingerstick result can prompt a dangerous, hurried dosing decision.
Late at night a meter shows 42 mg/dL while the person feels fine, or two fingersticks an hour apart differ by 60 mg/dL — that jolt of uncertainty can lead to an unsafe insulin or glucagon choice. Do a quick, systematic check before changing treatment.
Calmly confirm symptoms, repeat the fingerstick with a fresh drop after washing hands, inspect strips and expiry, and look for corroboration (a second meter or clinical test) before altering any dosing plan. If uncertainty remains, contact the clinician or emergency services rather than making a large treatment change on one questionable reading.
- ISO 15197 standard: 95% of results should be within ±15 mg/dL (<100 mg/dL) or ±15% (≥100 mg/dL).
- Treat discrepancies >20% (or >15 mg/dL at low values) as potentially unreliable until confirmed.
- Use the meter manufacturer’s control solution and printed acceptable range to verify strip/meter performance.
Accuracy benchmark and clinical thresholds
Glucose meters are judged against the ISO 15197 (2013) performance standard: 95% of meter results must fall within ±15 mg/dL of the reference when the true (lab) plasma glucose is <100 mg/dL, and within ±15% when ≥100 mg/dL. This is a regulatory benchmark, not a guarantee of exactness for every result.
The reference used by ISO is laboratory plasma glucose (venous plasma), so many meters report a plasma-equivalent value even though they measure capillary whole blood. That conversion explains some systematic differences between meter and lab results.
Small percentage errors can change treatment when readings sit near decision points. Examples:
- True lab 70 mg/dL → meter could read ~59–81 mg/dL (±15 mg/dL): may or may not trigger hypoglycemia treatment.
- True lab 180 mg/dL → meter could read ~153–207 mg/dL (±15%): could affect insulin dosing.
Consider a discrepancy meaningful if it exceeds ISO limits or causes crossing of a clinical threshold that would change management.
Quick home checklist to rule out meter error
-
Assess symptoms before changing treatment
If there are signs of severe hypoglycaemia or hyperglycaemia (confusion, collapse, persistent vomiting), follow emergency treatment immediately. If symptoms are absent or mild, pause and confirm the reading before corrective action.
-
Inspect strips and packaging
Check the expiry date, lot/batch number, and that strips were stored sealed and dry. Avoid strips that are expired, visibly damaged, or have been exposed to humidity or extreme temperatures.
-
Verify blood‑sampling technique
Wash and thoroughly dry hands, warm the finger if cold, and produce a free‑flowing drop without excessive squeezing; apply an adequate drop to the strip promptly. Follow the meter’s instructions about first‑drop versus second‑drop.
-
Check meter power and basic self‑checks
Confirm fresh batteries or charge, that the meter starts normally and shows correct date/time, and that strip contacts are clean. Test within the meter’s recommended temperature range.
-
Run a control or parallel test
Use manufacturer control solution with a new strip to verify the meter+strip combination, or test the same sample on a second meter if available. Compare results to the control range or to the other meter.
-
Document findings and repeat before treating
Record time, reading, strip lot, meter ID, symptoms, and recent food/medication; repeat the test after 5–10 minutes with a fresh strip before changing therapy unless clinical symptoms mandate immediate treatment.
Treat immediately if severe symptoms are present.
Signs that require immediate treatment: unconsciousness, seizures, inability to swallow, severe disorientation, persistent vomiting, or difficulty breathing. For suspected diabetic ketoacidosis (very high glucose with nausea, abdominal pain, rapid breathing), seek urgent care.Otherwise, document the reading and follow the checklist above to confirm accuracy before changing medications or insulin doses.
Perform a control‑solution test
-
Assemble materials
Gather the glucose meter, a fresh unexpired vial of manufacturer control solution, an unused strip from the same lot, and a log to record results.
-
Prepare the meter and strip
Turn the meter on and insert a new test strip exactly as for a blood test. Avoid contaminating the strip’s sample well or touching the sensing area.
-
Apply the control solution
Follow the manufacturer’s instructions: dispense a drop of control solution onto the strip’s sample area (or into a clean container if specified) and allow the meter to run the test.
-
Record the result
Write down the numeric result, the strip lot, control‑solution lot and expiry, date, and ambient temperature to track reproducibility.
-
Interpret and act
Compare the result to the printed control range on the control‑solution vial or packaging. If within range, strip chemistry is likely acceptable; if outside, repeat once, check expiry/temperature, try a different strip lot, and contact the manufacturer if out‑of‑range results persist.
Printed range = acceptable strip chemistry. If the control result falls inside the vial’s stated range, strips and reagent chemistry are functioning as intended. If the result is outside the range, possible causes include degraded strips, expired or contaminated control solution, incorrect temperature, or a meter fault — repeat the test and escalate to the manufacturer when out‑of‑range results repeat.
Escalation checks: second home meter and paired lab
Immediate cross-check with a second home meter
Perform a fresh fingerstick and test on a second meter within 5 minutes of the original reading. Use a different strip lot if available. Record: meter model, strip lot and expiration, control-solution result, exact time, puncture site, ambient temperature, and battery status. A clinically meaningful disagreement is beyond ISO 15197 limits: ±15 mg/dL when the lab reference is <100 mg/dL, or ±15% when ≥100 mg/dL.
Paired lab (venous plasma) test
Obtain a venous blood draw for plasma glucose within 10 minutes of the capillary meter test; do not eat, take insulin, or exercise between tests. Request plasma (not whole blood) glucose and note the lab time and method. Photograph the meter display, strip vial and control vial, and keep written timestamps. Compare meter versus lab using the ISO limits above — these timed, documented pairs provide the definitive accuracy assessment for clinicians or manufacturer claims.
Photograph displays and strip vials, note times to the minute, and log environmental conditions. Without timestamps and lot numbers, comparisons against ISO limits are unreliable.
Common myths, real causes, and quick fixes
Extreme temperature or humidity reliably skews strip chemistry and sensor electronics; move testing to room temperature and re‑test.
Strip enzymes and electronic calibration are temperature‑sensitive; testing at stable 18–30°C (check manufacturer) prevents predictable bias — warm a cold meter in a pocket for 10–15 minutes, cool an overheated meter out of direct sun before repeating.
Expired, contaminated, or wrong‑lot strips cause consistent errors; always check expiry, lot recalls, and storage.
Strip chemistry degrades with age, moisture, or sunlight and some lots have manufacturing defects — replace strip vial, use a fresh vial, and run a control solution if results differ.
Certain drugs and abnormal hematocrit alter meter readings depending on the sensor chemistry; lab comparison or manufacturer guidance is needed.
High/low hematocrit changes sample conductivity/enzymatic reaction; some compounds (check strip manual) chemically interfere — if suspicion remains after environmental and strip checks, get a venous lab glucose and consult the meter manual.
Weak batteries or poor strip contact and poor sampling technique cause frequent, reproducible errors; correct power/cleaning and sampling steps resolve many failures.
Low voltage affects electronics; debris prevents contact; insufficient or contaminated blood alters the reaction — replace batteries, clean the port per instructions, wash and dry the finger, avoid squeezing, and ensure adequate sample volume.
If repeated checks (control solution, second meter, lab sample) still disagree, stop treating based on that meter.
Seek replacement strips, contact the manufacturer for lot recalls, and consider a new meter or alternate technology — persistent discrepancies may indicate irreversible device failure or incompatible chemistry.
When to replace, report, or escalate
Decision rules
Replace the meter immediately if any of the following occur: control solution fails twice, visible physical damage, repeated erratic readings after basic troubleshooting, or results that contradict a paired laboratory plasma value. While replacing, use a known-good backup meter and treat symptoms per clinical protocols.
Contact the manufacturer when control failures, strip lot problems, or unexplained device errors appear. Include these items: serial number, strip lot and expiration, control-solution lot and results (with times), paired lab values with timestamps, and photos of the device/strips.
Escalate to a clinician or regulator when a device error causes incorrect treatment, serious harm, or affects multiple patients. Clinicians should document clinical impact, adjust therapy based on reliable measurements, and file an adverse-event report if indicated.
If a patient is symptomatic with severe hypo- or hyperglycemia, treat first using clinical protocols and alternate measurements. Quarantine suspect strips/meter, document all actions and times, and notify the clinician and manufacturer promptly.
What to look for and what to avoid
Daily habits that prevent false readings
Small daily habits cut error rates. Store strips in their original container, tightly closed and away from heat or humidity. Check expiry and lot numbers before every open vial and discard strips past their single‑use exposure window.
- Run control solution monthly, after opening a new strip lot, and after drops or physical shocks to the meter. Record results with date, meter ID, and strip lot.
- Keep the meter clean. Wipe the strip port and lancet area with isopropyl wipes and let dry; avoid alcohol on test surfaces immediately before sampling.
- Mind temperature and batteries. Test only within the meter’s specified range and replace batteries at first low‑battery alert.
- Use proper sampling technique. Warm the finger, wipe away the first drop if recommended, and apply adequate blood to the strip.
For guidance on choosing continuous glucose monitoring versus meters and for devices that share readings with caregivers, consult the links below.
Final rules: when to hold treatment and when to escalate
- Always treat immediate, severe hypoglycemia or life‑threatening symptoms regardless of meter doubts.
- Hold or delay non‑urgent treatment decisions when repeat testing and control steps point to meter error.
- Escalate when control solution is outside range, a second meter or lab confirms a discrepancy, or symptoms persist despite checks.
Prioritize safety: treat any severe hypoglycemic or life‑threatening presentation immediately. For non‑urgent or borderline readings, pause, repeat the test, run a control solution, and—if possible—check a second meter before changing long‑acting therapy.
Escalate when control results fall outside the vial range, a paired meter or laboratory plasma draw confirms a meaningful discrepancy, or symptoms continue. Photograph and save key evidence: meter display, strip lot/expiry and code, control result and vial range, timestamps, second‑meter/lab results, device serial/battery status, and symptom notes for clinicians and reporting.